Halloween Crochet Garland Pattern: Easy Step-by-Step
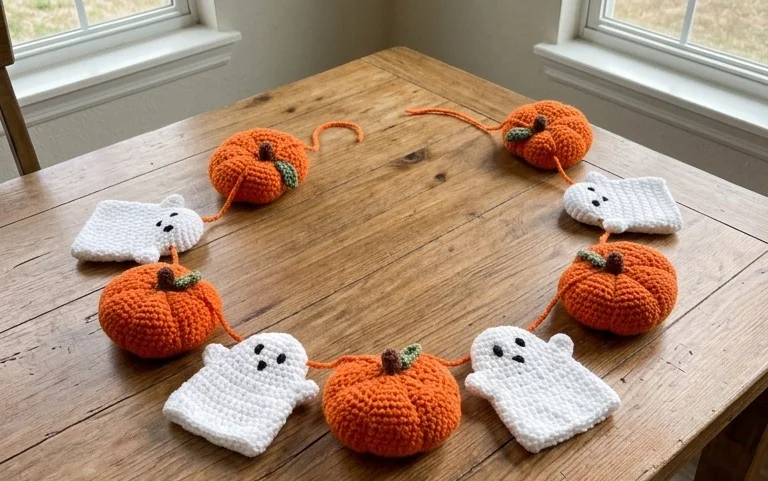
Small, weighted yarn spheres decorated with simple felt faces bring a touch of seasonal charm to any mantle or bookshelf. This project consists of classic round forms that feel firm in your hand and hold their shape beautifully against a length of twine. Beginners enjoy the repetitive, soothing motion of circular increases, while experienced makers appreciate how quickly these pieces come together for a last-minute party decoration. You will master the single crochet stitch in the round to create uniform shapes, learning how to manage tension for a dense fabric that prevents stuffing from peeking through the gaps.
Why This Project Is Worth Making
This project creates a classic, reliable amigurumi sphere that forms the foundation for countless stuffed animal designs. Working in a tight continuous spiral ensures that your stuffing remains contained and your finished piece maintains a clean, professional shape. Because this pattern relies on basic increases and decreases, it provides a meditative rhythm perfect for clearing your mind after a busy day. You will find that this structure is remarkably durable, making it an excellent choice for items meant for children or as decorative gifts.
I finally learned how to close my rounds without a visible seam thanks to the clear instructions here. My project looks much more polished than my previous attempts.
— Sarah, amigurumi enthusiast
Pattern Overview & Skill Level
- Skill Level: Beginner
- Approximate Time: 45 minutes
- Construction: Continuous rounds worked in a spiral, finished with a final decrease closure.
- Finished Dimensions: Approximately 3 inches in diameter when using worsted weight yarn.
Materials & Supplies Needed
- Yarn: Worsted weight (#4) acrylic or cotton yarn, approximately 30 yards.
- Hook Size: 3.75 mm (F-5) to achieve a tight tension that prevents stuffing from showing.
- Notions: Polyester fiberfill stuffing, stitch markers, yarn needle, and small scissors.
- Yarn Substitutions: You can use DK weight yarn with a 3.0 mm hook for a smaller size, or chunky weight yarn with a 5.5 mm hook for a larger, huggable plush. Note that changing yarn weight will alter your total yardage requirements.
Stitch Guide & Abbreviations (US Terms)
- MR: Magic ring
- ch: chain
- sc: single crochet
- inc: 2 sc in the same stitch
- dec: single crochet 2 stitches together (insert hook in next st, yo, pull up a loop, insert hook in following st, yo, pull up a loop, yo and pull through all 3 loops on hook)
- st/sts: stitch/stitches
- sl st: slip stitch
Step-by-Step Pattern Instructions
Work in a continuous spiral. Place a stitch marker in the first stitch of every round to track your progress.
Sphere Body
- Rnd 1: Start 6 sc in a magic ring (6 sts).
- Rnd 2: 2 sc in each st around (12 sts).
- Rnd 3: [1 sc, inc] 6 times (18 sts).
- Rnd 4: [2 sc, inc] 6 times (24 sts).
- Rnd 5: [3 sc, inc] 6 times (30 sts).
- Rnds 6–10: sc in each st around (30 sts).
- Rnd 11: [3 sc, dec] 6 times (24 sts).
- Rnd 12: [2 sc, dec] 6 times (18 sts).
- Rnd 13: [1 sc, dec] 6 times (12 sts).
Stuffing and Finishing
- Fill the sphere firmly with polyester fiberfill. Ensure the stuffing reaches the edges so the sphere maintains its round shape without lumps.
- Rnd 14: [dec] 6 times (6 sts).
- Fasten off, leaving a 6-inch yarn tail. Use your yarn needle to weave the tail through the front loops of the remaining 6 stitches. Pull tight to close the hole securely and bury the end inside the sphere.
Care & Washing Instructions
- Hand wash your finished item in cool water using a gentle soap to prevent fiber damage.
- Lay the piece flat on a clean towel to air dry, turning it occasionally to ensure even moisture evaporation.
- Gently squeeze or reshape the item once dry if it has become slightly compressed during transport or storage.
Pro Tips & Common Mistakes to Avoid
Maintain consistent tension throughout your rounds. If your stitches are too loose, the stuffing will peek through the gaps, which ruins the professional look of your amigurumi. Use a smaller hook size than recommended on the yarn label to create a denser fabric specifically for stuffed items.
Always move your stitch marker to the very first stitch of every new round immediately after completing it. Losing track of your count often happens at the start of the round, and correcting an error three rows later is difficult in continuous spiral work.
When weaving in your final yarn tail, do not pull too hard on the closure, as this can distort the shape of the sphere. You want to pull just enough to draw the stitches together into a flat, invisible point.
Adjust the size of your project by adding or omitting rows of plain single crochet (Rnds 6–10). Adding rows will make a taller, oval shape, while removing rows will result in a flatter, disc-like appearance. Note that changing the row count will require more or less yarn depending on the adjustment.
Frequently Asked Questions
Can I use cotton yarn instead of acrylic for this pattern?
Yes, cotton yarn works exceptionally well for amigurumi because it has less stretch than acrylic, which keeps your stitches tight and defined.
Is it okay to sell items made from this pattern?
Always check the specific designer’s terms included with your pattern source. Generally, if the pattern is free for personal use, you should verify if commercial use is permitted before selling finished goods.
Why do my rounds look like they are shifting to the right?
Working in a continuous spiral naturally causes the stitches to lean slightly. This is normal and expected in amigurumi; it does not indicate a mistake in your stitch count.
What is the best way to stuff the sphere evenly?
Add the stuffing in small clumps rather than one large piece. This helps you distribute the fill evenly and prevents hard lumps from forming in the center of the sphere.
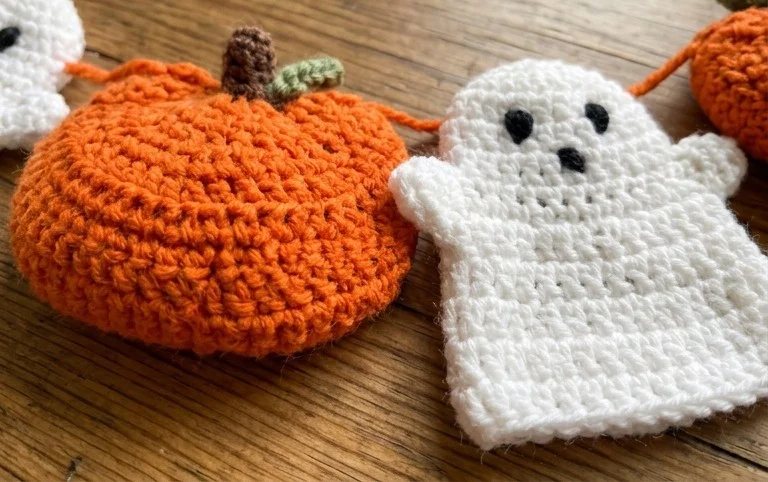
Your new seasonal bunting adds a handcrafted touch to your home that lasts far longer than store-bought paper versions. You might try swapping the traditional orange yarn for deep purple or neon green to shift the color scheme toward a more modern aesthetic. Please tag your finished photos on social media so we can see how your string of spheres turned out. Take a moment to browse the rest of our collection of free patterns for your next quiet afternoon project.