How to Join Granny Squares: Easy Zigzag Slip Stitch Guide
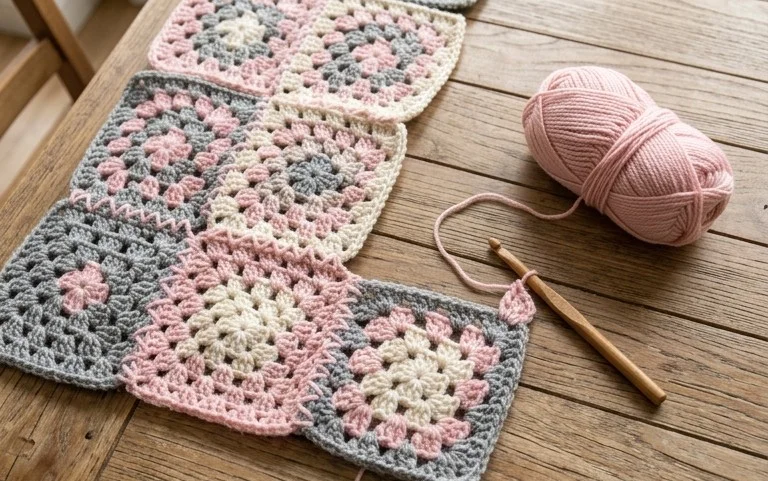
Joining dozens of small squares can feel like a daunting chore, yet this simple zigzag slip stitch creates a sturdy, decorative seam that adds personality to any crochet blanket. The finished connection looks like a delicate braid running across the fabric, lying flat enough for comfort while providing structural integrity that holds up through years of washing. Beginners often find this method more approachable than traditional sewing because it relies on the same hook and yarn used for the squares themselves. This technique works wonders for merging mismatched stash scraps into a cohesive, textured piece that keeps you warm on cold evenings.
Why Crocheters Love It
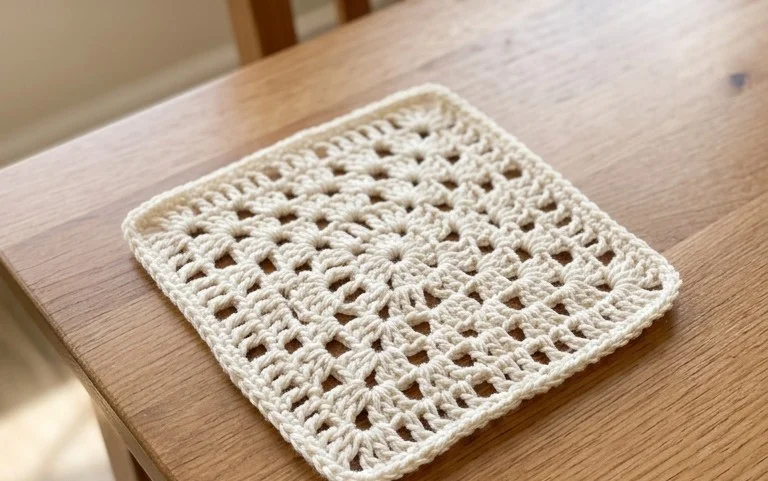
The Classic Crochet Granny Square is the quintessential project for any fiber artist, serving as the building block for blankets, cardigans, and home decor. This pattern is prized for its rhythmic, repetitive nature that makes it easy to memorize after just one round. It is exceptionally friendly for beginners learning to manage tension and double crochet stitches, while also acting as the perfect stash-buster for leftover yarn ends. Because each square works up in mere minutes, you can easily track your progress and see your project grow with every completed unit.
I finally learned to crochet with this pattern. The instructions are so clear that I managed to make ten squares in a single afternoon for my first tote bag.
— Sarah, hobbyist maker
Pattern Overview & Skill Level
- Skill Level: Beginner
- Approximate Time: 15–20 minutes per square
- Construction: Worked in rounds starting from a center ring, creating a flat square shape
- Finished Dimensions: Approximately 5 inches by 5 inches using medium weight yarn
Materials & Supplies Needed
- Yarn: Worsted weight (#4), 100% acrylic or wool blend, approximately 15 yards per square
- Hook Size: 5.0 mm (US H-8)
- Notions: Tapestry needle for weaving in ends, scissors, stitch markers if working in a long sequence
- Yarn Substitutions: You can use DK weight yarn for a smaller, more delicate square or bulky weight yarn for a larger, quicker square; however, note that changing the yarn weight will require an adjustment in hook size and will alter the final dimensions.
Stitch Guide & Abbreviations (US Terms)
- ch = chain
- dc = double crochet
- sl st = slip stitch
- sp = space (the gap created by ch-stitches)
- st(s) = stitch(es)
- Magic Ring: A method of starting a round by crocheting into a loop of yarn that can be tightened to close the center hole completely.
Step-by-Step Pattern Instructions
This pattern is worked in joined rounds. After each round, join with a slip stitch to the top of the first stitch of that round and chain up to begin the next.
Rnd 1: Start with a magic ring. Ch 3 (counts as first dc), work 2 dc into the ring, ch 2. Work 3 dc, ch 2 3 times into the ring. Join with a sl st to the top of the beginning ch-3. (12 dc, 4 ch-2 spaces)
Rnd 2: Sl st into the next dc and into the first ch-2 corner space. Ch 3, (2 dc, ch 2, 3 dc) in same corner space. Ch 1, (3 dc, ch 2, 3 dc) in next corner space. Repeat from * to * twice more. Ch 1, join with a sl st to the top of the beginning ch-3. (24 dc, 4 ch-1 spaces, 4 ch-2 spaces)
Rnd 3: Sl st into the next 2 dc and into the first ch-2 corner space. Ch 3, (2 dc, ch 2, 3 dc) in same corner space. Ch 1, 3 dc in next ch-1 space, ch 1, (3 dc, ch 2, 3 dc) in next corner space. Repeat from * to * twice more. Ch 1, 3 dc in next ch-1 space, ch 1, join with a sl st to the top of the beginning ch-3. (36 dc, 8 ch-1 spaces, 4 ch-2 spaces)
Rnd 4: Sl st into next 2 dc and into corner space. Ch 3, (2 dc, ch 2, 3 dc) in corner space. Ch 1, 3 dc in next ch-1 space, ch 1, 3 dc in next ch-1 space, ch 1, (3 dc, ch 2, 3 dc) in corner space. Repeat from * to * twice more. Ch 1, 3 dc in next ch-1 space, ch 1, 3 dc in next ch-1 space, ch 1, join with a sl st to top of ch-3. (48 dc, 12 ch-1 spaces, 4 ch-2 spaces)
Care & Washing Instructions
- Hand wash in cool water using a mild detergent specifically designed for wool or acrylic fibers.
- Lay the square flat on a clean towel to air dry, ensuring it is shaped into a perfect square.
- Lightly steam block if the edges curl, keeping the iron a few inches away from the yarn surface.
Pro Tips & Common Mistakes to Avoid
Maintain consistent tension by ensuring your yarn feed is smooth; if your tension is too tight, the square will cup or buckle, while too loose will make it floppy. Always place a stitch marker in the first stitch of each round if you are working continuously, though for these joined rounds, simply double-check that you have joined to the ch-3 of the previous round to keep your corners aligned. Weave in your ends by traveling through the back loops of the stitches on the wrong side for at least one inch to ensure the ends do not unravel with use. If you wish to make a larger square, simply repeat the pattern of placing 3 dc in every ch-1 space along the sides and (3 dc, ch 2, 3 dc) in the corners until you reach your desired size.
Frequently Asked Questions
Can I use cotton yarn instead of acrylic?
Yes, cotton yarn works beautifully for granny squares. Note that cotton has less stretch than acrylic, so your finished square may feel slightly firmer and may require more aggressive blocking to lie flat.
How do I adjust the size of the square?
You can make the square as large as you like by adding more rounds. Simply continue to work 3 dc in each ch-1 space along the edges and (3 dc, ch 2, 3 dc) in each corner space until the square reaches your target size.
Are these squares suitable for a beginner?
This is an ideal pattern for those new to crochet. It focuses on the double crochet stitch and chaining, which are the most fundamental skills required for almost all garment and blanket construction.
Am I allowed to sell items made from this pattern?
You are welcome to sell finished items made from this pattern as long as you credit the design. Please ensure you take your own photographs of the finished work for your shop listings.
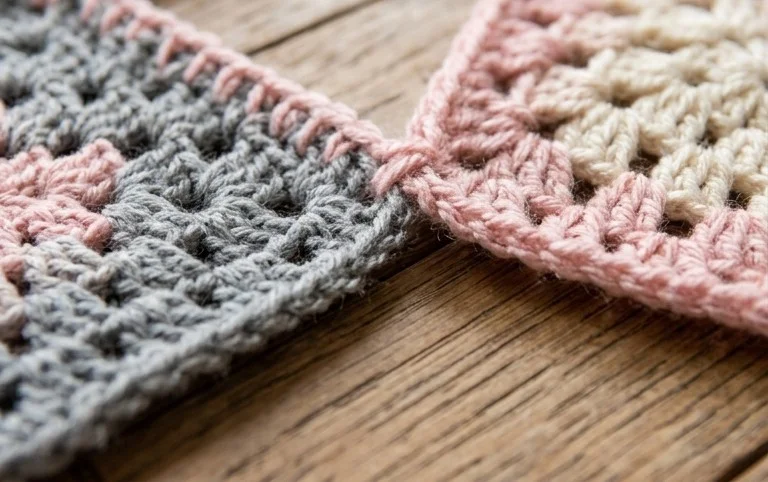
Seeing your individual motifs transform into a finished throw or garment provides a real sense of accomplishment after those hours of rhythmic stitching. You might try using a contrasting color of yarn for the seams to make the zigzag pattern pop against more muted square colors, or stick to a matching shade for a subtle, blended look. Posting a picture of your finished work online helps others find inspiration for their own yarn piles. You are welcome to browse the rest of the blog for more free patterns to start your next creative project.