Easy Crochet Lace Square Motif: Free Beginner Pattern
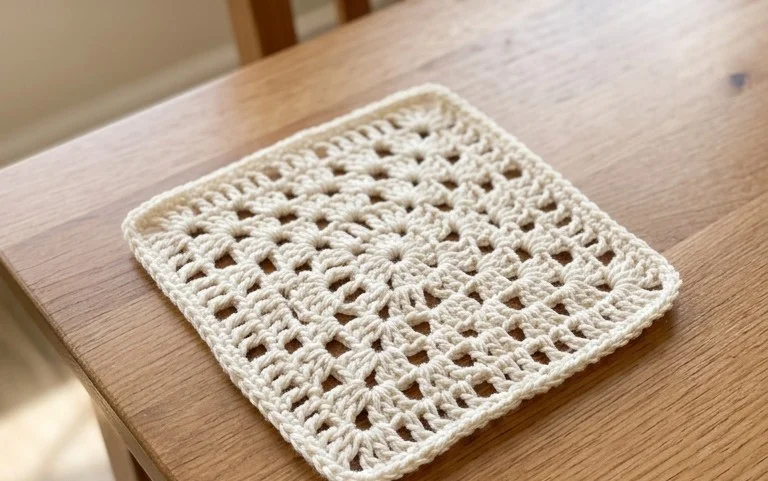
This simple lace square has an open, airy texture that drapes softly against your skin, making it a great choice for lightweight summer blankets or decorative pillows. Beginners often appreciate how the consistent stitch pattern builds confidence while creating a polished accessory that looks like professional work. You will learn the mechanics of the chain space and the double crochet cluster, which combine to form the classic gaps that define this style. It is a satisfying project to hold in your hands after only thirty minutes of work, and it remains a reliable way to practice keeping your edges straight.
Why You’ll Love This Pattern
The Classic Crochet Granny Square is the foundational building block for endless projects, from heirloom blankets to modern tote bags. You will appreciate how quickly these squares work up, allowing you to see visible progress within minutes of picking up your hook. Because this pattern relies on a rhythmic, repetitive stitch sequence, it serves as an ideal project for practicing consistent tension and maintaining even stitch counts. Utilizing scrap yarn from previous projects makes this an economical way to clear your stash while creating a vibrant, personalized color palette.
I finally mastered the granny square after struggling with other methods. The clear counting instructions helped me understand exactly where to place my hook for each corner cluster.
— Sarah, hobbyist crafter
Pattern Overview & Skill Level
- Skill Level: Beginner
- Approximate Time: 30 to 45 minutes per square
- Construction: Worked in joined rounds, starting from a center ring and expanding outward
- Finished Dimensions: Approximately 5 inches by 5 inches using medium weight yarn
Materials & Supplies Needed
- Yarn: Worsted weight (#4), 100% cotton or acrylic blend, approximately 25 yards per square
- Hook Size: 5.0 mm (US H-8)
- Notions: Tapestry needle for weaving in ends, scissors, and a measuring tape
- Safe yarn substitutions: You can use DK weight yarn for a smaller, tighter square, or bulky weight yarn for a larger square. Note that changing yarn weight requires adjusting your hook size to maintain the correct gauge and fabric drape.
Stitch Guide & Abbreviations (US Terms)
- ch = chain
- st = stitch
- sl st = slip stitch
- dc = double crochet
- dc cluster = 3 double crochet stitches worked into the same space
- sp = space
- MR = magic ring (or alternatively, ch 4 and join with a sl st to form a loop)
Step-by-Step Pattern Instructions
Center and First Round
- Start: Create a MR or ch 4 and sl st to the first ch to form a loop.
- Rnd 1: Ch 3 (counts as first dc here and throughout), work 2 dc into the ring. Ch 2, *3 dc into the ring, ch 2. Repeat from * 2 more times. Join with a sl st to the top of the beginning ch-3. (12 dc, 4 ch-2 spaces)
Expanding the Square
- Rnd 2: Sl st into the next dc and into the corner ch-2 sp. Ch 3, 2 dc in same ch-2 sp, ch 2, 3 dc in same sp (first corner made). *Ch 1, skip 3 dc, (3 dc, ch 2, 3 dc) in next ch-2 sp. Repeat from * 2 more times. Ch 1, join with a sl st to the top of the beginning ch-3. (24 dc, 4 ch-2 spaces, 4 ch-1 spaces)
- Rnd 3: Sl st into the next 2 dc and into the corner ch-2 sp. Ch 3, 2 dc in same sp, ch 2, 3 dc in same sp. Ch 1, 3 dc in the next ch-1 side space, ch 1. *(3 dc, ch 2, 3 dc) in corner ch-2 sp, ch 1, 3 dc in ch-1 side sp, ch 1. Repeat from * 2 more times. Join with a sl st to the top of the beginning ch-3. (36 dc, 4 ch-2 spaces, 8 ch-1 spaces)
- Finishing: Fasten off yarn leaving a 6-inch tail. Use a tapestry needle to weave the end securely into the back of the work to prevent unraveling.
Care & Washing Instructions
- Hand wash in cool water using a gentle detergent specifically formulated for delicate fibers.
- Lay the square flat on a clean towel and reshape it to its original dimensions while damp.
- Avoid wringing or twisting the piece, as this can stretch the stitches and distort the square shape.
Pro Tips & Common Mistakes to Avoid
- Maintain Tension: If your square begins to ruffle or curl, your stitches are likely too tight or you have added extra stitches in the side spaces. Ensure you strictly follow the chain-1 spaces between clusters.
- Use Stitch Markers: Place a stitch marker in the first ch-3 of every round to easily identify where to join your slip stitch when completing the round.
- Weaving Ends: Weave your yarn tails in multiple directions through the back loops of the dc clusters to ensure the ends stay hidden and secure even after repeated washing.
- Adjusting Size: To make a larger square, simply repeat Round 3, increasing the number of ch-1 side spaces by one for each additional round added. Note that larger squares will require significantly more yarn.
Frequently Asked Questions
Can I use a different hook size than recommended?
Yes, changing your hook size will alter the size and density of your square. A smaller hook creates a stiffer, tighter fabric, while a larger hook results in a looser, more open weave. Always check your gauge if you need the square to be an exact size.
How do I join multiple squares together?
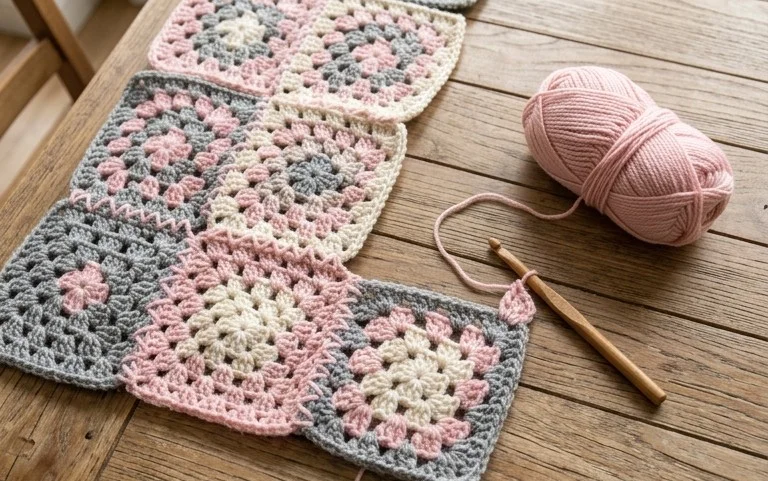
You can join squares using a whip stitch along the back loops or by using a single crochet join. The whip stitch provides a nearly invisible seam, whereas the single crochet join adds a decorative ridge between the squares.
Is this project suitable for absolute beginners?
This pattern is ideal for beginners because it uses basic stitches and a repetitive structure. If you are new to crochet, take your time during the first round to ensure you are comfortable identifying the chain spaces before moving to more complex rounds.
Am I allowed to sell items made from this pattern?
You are welcome to sell finished items created from this pattern. However, you must credit the designer for the pattern and use your own original photographs for any online listings.
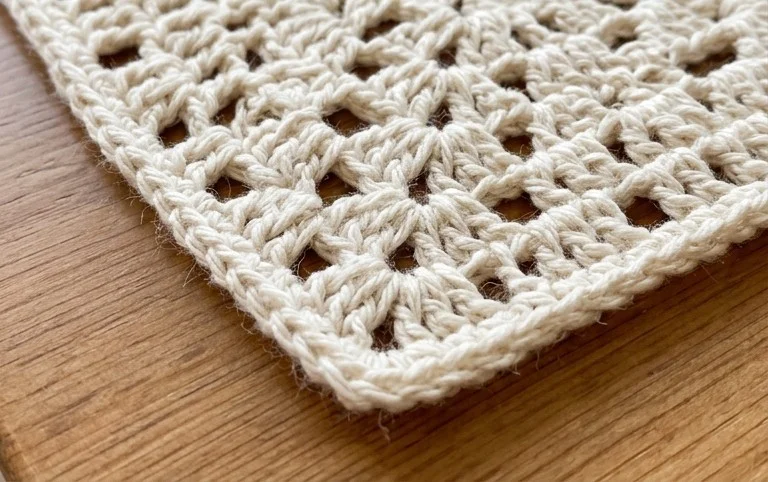
Your finished lace square adds a light, airy touch to any home space and works well as a building block for larger bedding or table runners. You might consider using a variegated cotton yarn to change the mood of the square without needing to learn any new stitches or complex techniques. Sharing a photo of your progress helps others see how your chosen color scheme looks once the work is complete. Please continue browsing the blog for more patterns that help you build your crochet skills one stitch at a time.